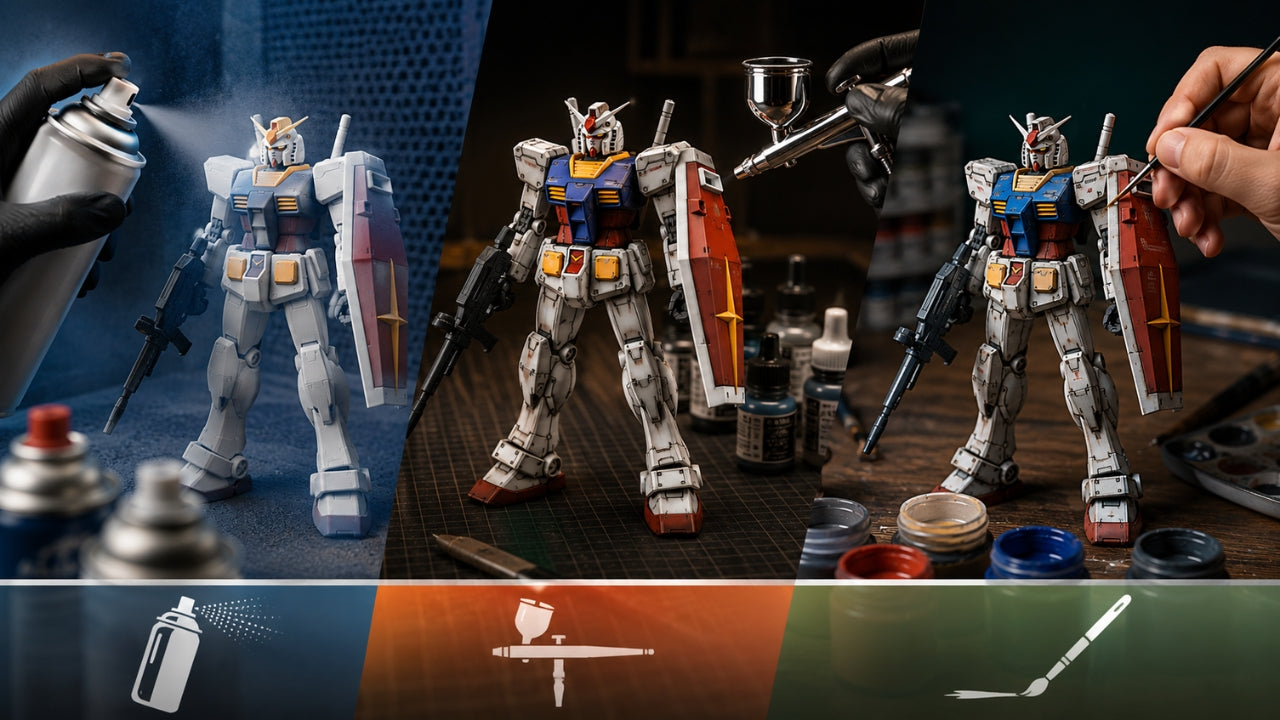
Gunpla Painting for Beginners: Spray Can vs Airbrush vs Hand Brush
Which Painting Method Should You Choose for Gunpla?
Gunpla painting is optional—many models look excellent out of the box. But painting opens new possibilities: color corrections, custom schemes, improved detail depth, and creative expression. The challenge is choosing the right painting method. Should you use spray cans, invest in an airbrush, or start with hand painting? This complete guide compares all three approaches, covering costs, learning curve, quality results, and when each method makes sense.
Method 1: Spray Can (Aerosol Paint)
Spray cans are the most accessible and affordable painting method. You can pick up cans at any hobby shop and start painting within minutes of deciding to paint.
Spray Can Basics
How it works: Pressurized paint in a can with a trigger-activated nozzle. Shake the can, aim at your model, press the trigger. Paint flows out as a fine mist that settles evenly on the surface.
Recommended products: Tamiya spray cans, Mr. Hobby spray cans, or Rust-Oleum matte finishes. Avoid hardware store spray paint—it's too thick and creates rough surfaces on delicate models.
Costs
- Initial investment: $0 (you might already have a spray can at home)
- Per can cost: $6-10
- One can coverage: 2-4 models depending on model size and paint type
- Startup total: $20-30 for a small color palette and primer
Pros of Spray Can Painting
- Incredibly affordable. Cost is the main advantage. You can paint five models for the cost of an airbrush
- No equipment needed. No compressor, no spray booth, no special setup
- Fast and convenient. Paint a model in 15-20 minutes (drying time not included)
- Smooth, even finish. When done correctly, spray cans produce professional results
- Great for beginners. Simple learning curve. Pick up a can and start painting
- Variety of colors available. Major brands offer extensive color ranges
- Good for large coverage areas. Spray cans are faster than hand brushing for painting large surfaces
Cons of Spray Can Painting
- Less control. You can't easily paint small details or precise lines
- Weather dependent. Spray cans require specific temperature and humidity ranges. Outside the range, paint dries wrong or doesn't adhere
- Overspray. Paint mist extends beyond your target area, requiring masking or containment
- Limited to simple projects. Complex color schemes with multiple thin layers are tedious with spray cans
- Environmental concerns. Aerosol propellants and VOCs (volatile organic compounds) are not ideal for the environment
- Pressure control limited. You can't adjust paint flow like you can with an airbrush
- Harder to fix mistakes. Overspray is difficult to clean up without damaging details
Best Practices for Spray Can Painting
- Prime first. Use gray or white primer as the base coat. This improves color adhesion and coverage
- Multiple thin coats. Apply 2-3 thin mists rather than one heavy coat. Heavy coats run and drip
- Shake thoroughly. At least 30 seconds of vigorous shaking ensures even paint distribution
- Use a spray booth or containment area. A cardboard box with ventilation prevents overspray from coating your workspace
- Mask what you want to protect. Use painter's tape to protect adjacent areas from overspray
- Check temperature and humidity. Don't spray if it's below 65°F or above 85°F, or if humidity is above 70%
- Test spray on scrap plastic first. Verify the color and coverage on a test piece before painting your model
- Maintain distance. Hold the can 6-8 inches from the model. Too close causes runs; too far causes dry spray
- Light passes are better than heavy passes. Build coverage gradually rather than trying to cover everything in one pass
- Allow adequate drying time. Most spray paints need 24 hours to fully cure. Handle gently before then
When to Use Spray Cans
- You're painting your first or second model
- You're on a tight budget
- You want to paint large surface areas with single colors
- You don't have space for additional equipment (compressor, air lines)
- You want fast results without learning a new tool
Method 2: Airbrush
Airbrush painting is the professional standard. If you've seen beautifully painted competition models or professional Gunpla photos, they were likely airbrushed. Airbrushes offer unmatched control, speed for large projects, and professional-quality results.
Airbrush System Overview
Components: Airbrush (the paint delivery tool), compressor (provides air pressure), air hose (connects them), paint (thinned liquid), and cleaning supplies.
How it works: The compressor pushes air through the airbrush. You load thinned paint into the airbrush cup. Pulling the trigger releases paint through a tiny nozzle, creating a fine spray mist more controlled than spray cans.
Costs
- Initial investment (entry level): $150-250 for a basic setup (compressor + airbrush + accessories)
- Initial investment (quality setup): $300-500 for better equipment and tools
- Per-use paint cost: Minimal. One bottle of airbrush paint covers 10+ models
- Maintenance supplies: Cleaning solution, needle replacements, nozzle replacements ($20-50 annually)
- Total to quality output: $200-400 upfront, then $5-10 per year after
Cost consideration: If you plan to paint more than 5-6 models, an airbrush pays for itself in paint savings. If you'll only paint 1-2 models, spray cans are more economical.
Pros of Airbrush Painting
- Extreme control. Paint tiny details precisely. Create sharp color lines. Apply graduated color transitions
- Faster coverage for large areas. Once you master the airbrush, painting large surfaces is faster and cleaner than spray cans
- Professional results. Airbrushed models look noticeably higher quality than spray-painted models
- Easy color customization. Mix any color you want. Create custom shades unavailable in spray cans
- Thin, even coats. Airbrush paint is thinned to perfection, creating incredibly smooth finishes
- Minimal overspray. Much less paint waste compared to spray cans
- Environmentally superior. No aerosol propellants. Less paint waste overall
- Better for complex schemes. Multi-color or camo patterns are much easier with airbrush precision
- Adjustable pressure and flow. You control paint volume and air pressure, adapting to different tasks
- Long-term value. After the initial investment, per-model costs are very low
Cons of Airbrush Painting
- High upfront cost. $150-400 is a significant investment. Spray cans are cheaper to start
- Steep learning curve. Takes 10-20 models to master airbrush technique. Early results may be worse than spray cans
- Equipment maintenance required. Airbrushes need cleaning after every use. Compressors need seasonal maintenance
- Space requirements. You need a compressor location and spray booth area
- Noise. Compressors are loud. Not suitable for shared living spaces
- Paint preparation. Paint must be thinned correctly. Wrong viscosity ruins results
- Needle and nozzle care. These are delicate and can be damaged by improper cleaning or storage
- Complexity. More variables to control: pressure, paint viscosity, distance, trigger control
- Initial quality is rough. Your first 5 airbrushed models won't look as good as your first spray-painted models
Best Practices for Airbrush Painting
- Start with an entry-level airbrush. Brands like Iwata Neo, Badger Patriot, or Master are beginner-friendly and reliable
- Thin paint properly. Paint should flow through the airbrush smoothly. Too thick and it clogs; too thin and colors are anemic
- Practice on scrap plastic first. Shoot 10-15 test passes on plastic sprue before painting your actual model
- Start with single-color large areas. Before attempting fine details, master painting large surfaces evenly
- Use proper compressor pressure. 20-30 PSI (pounds per square inch) is typical for detail work
- Clean immediately after use. Run thinner through the airbrush until only clear thinner comes out. Never let paint dry inside
- Prime before paint.
Leave a comment
This site is protected by hCaptcha and the hCaptcha Privacy Policy and Terms of Service apply.